How to Get Rid of Bed Bugs: Proven Treatment Option
To get rid of bed bugs, pair whole-home heat treatment (117–122°F) with targeted, rotating insecticides and strict follow-up. Heat kills bugs and eggs fast; chemicals like pyrethroids, neonicotinoids, and IGRs mop up survivors and resistance. Prepare by decluttering, laundering on high heat, and encasing mattresses. Schedule follow-ups within two weeks and keep encasements sealed 12–18 months. Expect $1,500–$5,000 for whole-home jobs. You’ll also learn how to spot signs, prevent reinfestation, and choose a qualified pro.
Key Takeaways
- Confirm infestation: look for welts, rusty stains, fecal spots, shed skins, eggs, and a sweet musty odor near sleeping areas.
- Heat treatment is fastest: whole-home heating to 117–122°F kills bugs and eggs in one session; schedule follow-up monitoring.
- Use integrated chemical control: rotate pyrethroids, neonicotinoids, and IGRs for resistance management and sustained knockdown.
- Prepare thoroughly: declutter, launder/dry on high heat, bag items, vacuum, and encase mattresses/box springs before treatment.
- Follow IPM with follow-ups: inspect within two weeks, keep encasements 12–18 months, reduce clutter, and monitor to prevent reinfestation.
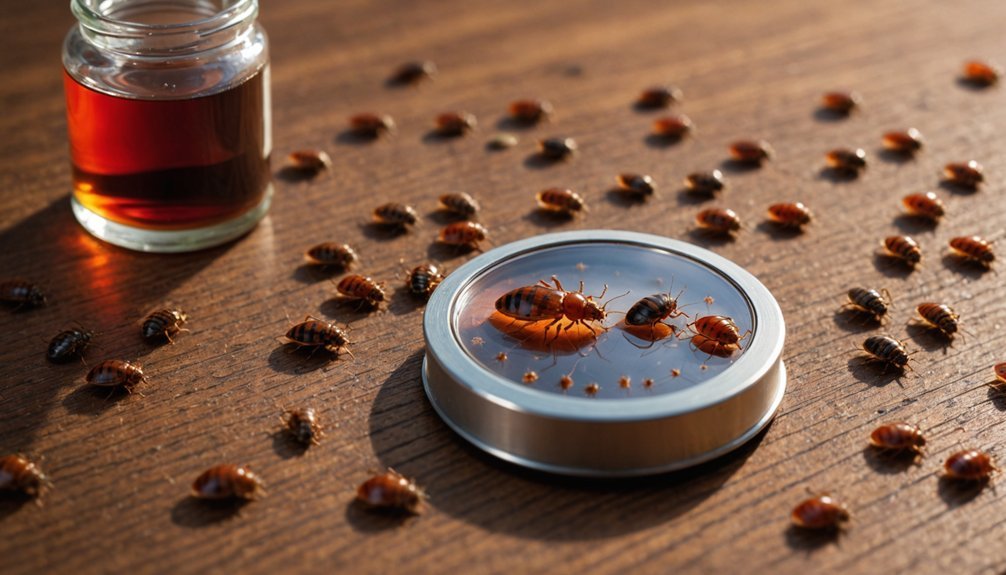
Signs You Have a Bed Bug Infestation
Worried those itchy mornings aren’t a coincidence? Start by checking your skin. Bed bug bites often show up as small, itchy red welts on exposed areas—face, neck, arms, and hands—sometimes arranged in clusters of 3–5 in zigzag or straight lines.
You might see darker centers with red halos, but bites can take 1–several days to appear, and some people show no reaction at all.
Scan your bedding for rusty or reddish spots from crushed bugs and small brown-to-black stains—excrement—concentrated on sheets, mattress seams, and upholstered furniture.
Look closely in mattress folds, box springs, and bed frame cracks for live bugs, shed skins, and pinhead-sized pale eggs or white eggshells. Black dots the size of periods also signal fecal deposits. Bed bugs are experts at hiding in small crevices like mattress seams, furniture joints, and even electrical outlets.
Trust your nose, too. A sweet, musty odor around sleeping areas can indicate a growing infestation.
Expand your search to couches, chair seams, cushions, curtain folds, baseboards, and clutter near beds—especially after travel or guests.
Heat Treatment: How It Works and Why It’s Effective
You’ll heat your entire home using professional equipment that circulates hot air into every crack and crevice.
The goal is to sustain lethal temperatures—typically 117–122°F (47–50°C), with at least 113°F held for 90 minutes—to kill bed bugs and eggs.
When done correctly, this whole-home approach often eradicates infestations in a single session with success rates around 95% or higher. This method is effective against bed bugs and their eggs, as well as other pests.
Whole-Home Heat Process
A whole-home heat treatment drives bed bugs to their thermal limits by raising your rooms to 120–135°F and holding that heat long enough to kill bugs and eggs wherever they hide.
Pros use electric or propane systems to blast heated air for several hours, with high-velocity fans pushing warmth into corners, cracks, furniture, mattresses, and wall voids. Sensors placed throughout the space confirm target temps, and crews keep heat on at least 60 minutes after every sensor hits the mark. Heat is highly effective but has no residual protection, so follow-up monitoring or targeted pesticides may be needed to prevent reintroduction.
Positive pressure from mylar ducting helps eliminate cold spots; technicians also rotate infested items.
Expect about six hours from setup to takedown; four heaters typically cover 900–1,100 square feet. You don’t bag belongings, most jobs finish in one visit, and you can reenter immediately.
Lethal Temperature Thresholds
When you heat for bed bugs, success comes down to hitting lethal temperatures long enough in the places they hide. Adults start dying around 112–115°F, but only after hours. At 113°F, complete adult mortality needs about 95 minutes; at 118°F (48.3°C), it’s much faster; at 120°F, death occurs within minutes.
Eggs are tougher: they can survive 7 hours at 113°F and need 118.4°F for roughly 72 minutes, or 122°F for near-immediate death.
You must deliver heat where bugs actually are. Ambient 135°F for 4–5 hours doesn’t guarantee 122°F in cracks, baseboards, or utility closets. Insulation, furniture, and thermal mass slow heat-up, and some floor-wall junctions may never hit target temps. Technicians should actively monitor and adjust heaters to ensure cracks and crevices reach lethal temperatures.
Use multiple sensors and prioritize temperature consistency over brief peaks.
One-Session Eradication Rate
Hitting and holding lethal temperatures where bed bugs hide explains why a single, well-run heat treatment often finishes the job.
When pros raise rooms to 122–140°F and hold lethal thresholds for 90+ minutes, heat penetrates wall voids, furniture crevices, and seams that sprays miss. Industrial heaters and fans deliver uniform coverage, while thermal imaging hunts cold spots so nothing survives. Many companies back this with a 100% guarantee reflecting their confidence and experience.
You can expect one-session eradication rates of 95% or higher with professional services; many providers even offer 100% guarantees when preparation and sealing are done correctly.
Heat doesn’t rely on sight or suffer resistance, and it kills eggs and adults together, preventing rebound. Unlike chemicals needing multiple visits, a proper heat session gives immediate results and often eliminates the need for follow-ups.
Chemical Treatment Options and When to Use Them
Three main chemical classes—pyrethroids, neonicotinoids, and insect growth regulators (IGRs)—form the backbone of bed bug control, each with distinct strengths and limits.
Pyrethroids deliver fast knockdown but face rising resistance in long-infested areas. When pyrethroids underperform, switch to neonicotinoids; they act slower but often overcome resistance.
Pyrethroids knock down fast; if they fail, switch to slower, resistance-busting neonicotinoids.
IGRs don’t kill adults quickly; they disrupt maturation and reproduction, helping collapse populations over time.
Use chemicals when you need durable protection, a lower-cost option than whole-structure heat, or a quick-to-apply plan that can run over several weeks.
Success tops 90% under proper conditions, but resistance, poor coverage, and clutter reduce results. Inspect carefully, clean, and target harborages—bed frames, seams, crevices.
Apply with pressurized sprays or foggers for even reach, and time follow-ups to hit emerging nymphs. Rotate classes to delay resistance.
New Insecticides: What Research Reveals

Although bed bug control has long leaned on aging chemistries, new research is reshaping the landscape—most notably Rutgers’ work on isocycloseram, an isoxazoline that delivers rapid, reliable kills even against resistant Cimex lectularius.
You get proven performance across multiple lab and field strains, including populations exposed to insecticides for over a decade. Tests show superior selectivity against invertebrate pests and a clear leap after years of stalled innovation.
Formulation matters. Two versions—400 SC and 45 SC—were evaluated. The 45 SC performed slightly better: at 0.1% it reached 100% mortality on resistant strains, and even 0.05% and 0.025% achieved 100% within five days with direct sprays.
The 400 SC at 0.1% worked well but killed more slowly.
Against current products, isocycloseram stands out. It outperformed five common insecticides; only 0.1% isocycloseram exceeded 90% mortality on Canfield and Masiello strains.
Residuals impress, too: 45 SC kept 100% mortality after 30 days on porous and non-porous surfaces.
Integrated Pest Management for Long-Term Control
While no single tactic can wipe out bed bugs for good, an integrated pest management (IPM) program delivers sustained control by combining precise inspection, targeted treatments, and disciplined follow-up.
You’ll see measurable gains: complete elimination in 100% of infested apartments within six months, a 98% reduction in counts, and community rates dropping from 15% to 2.2% in 12 months.
IPM sites outperform conventional programs, cutting infestations by 49–64% vs. 26%, with 76% cleared in the first month.
Lean on non-chemical tools when feasible. Low-level infestations ended with non-chemical methods in 57% of cases.
Focus on crack/crevice sealing (38%), bedding management/replacement (32%), wooden furniture modification (18%), and selective wallpaper/structural fixes (14%).
Scale matters. Proactive building-wide surveys revealed 71% of cases unknown to management.
Biweekly service plus monitoring minimized introductions to 3–7% vs. 11% at controls.
Train residents. Satisfaction hit 100%, stress dropped, and DIY steps reduced costs and pesticide use.
Sustain results with proactive inspections and biweekly monitoring, ending only after three consecutive clear visits.
Application Techniques That Maximize Results

Because bed bugs hide deep in seams and gaps, you’ll get the best results by pairing precise, targeted applications with room-wide coverage and strict timing.
Inject foam into cracks and crevices—bed frame joints, wall openings, and baseboard gaps—to flood harborage sites and extend contact time. Use spot treatments (under two square feet) on confirmed hotspots like tufts, folds, and screw holes. Follow with a pressurized spray for even coverage across bed frames, furniture undersides, and perimeter seams.
Avoid relying on foggers alone; they disperse widely but miss hidden clusters. If fumigation is indicated, guarantee proper containment and dosage. Rotate chemical classes and combine adulticides with IGRs to counter resistance and disrupt development. Schedule sequential applications over several weeks to hit newly hatched nymphs.
- Adhere strictly to label dosages to prevent survival and rebound.
- Use specialized injection tools for precision in tight voids.
- Space follow-ups to intercept eggs as they hatch.
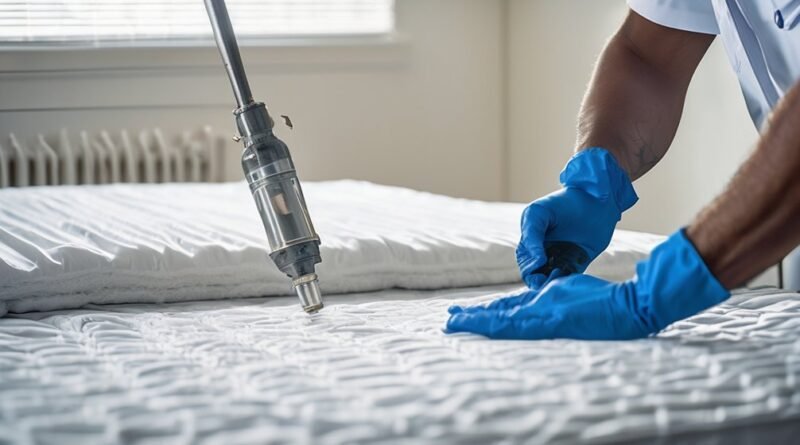
Preparing Your Home for Professional Treatment
Before the pros arrive, you’ll declutter hard, bag trash immediately, and launder all washable fabrics on high heat, sealing clean items in plastic.
Protect and isolate your bed by encasing the mattress and box spring, moving the frame 6 inches from walls, tucking bedding, and using interceptors.
Give technicians full access by disassembling key furniture, clearing under beds, and pulling items and furniture away from walls.
Declutter and Launder Thoroughly
Even with a pro on the way, your prep can make or break the treatment’s success. Start by stripping clutter that shelters bugs. Toss magazines, newspapers, and all cardboard; switch to plastic bins. Keep clothes off floors and remove what you don’t use.
Bag trash and vacuum bags in plastic and take them straight to outdoor bins. Don’t carry items from infested rooms into clean areas.
Wash and dry all fabric items from treated rooms on high heat. Run bedding, pillows, curtains, and clothing through a hot wash, then dry at least 50 minutes on high. Store cleaned items sealed in plastic until treatment ends. Use approved alternatives for heat‑sensitive fabrics.
- Keep bagged items in the same room
- Inspect books and electronics before bagging
- Vacuum furniture, drawers, and rugs thoroughly
Protect and Isolate Bedding
With laundry handled and clutter out of the way, turn your focus to making the bed a safe zone. Strip the bed completely—sheets, covers, dust ruffles, comforters, pillows—and heat-treat everything. Wash on the hottest setting and dry on high for 40–50 minutes. Bag cleaned items in sealed totes until treatment’s done. Remove and heat-dry curtains and window dressings.
Install bed-bug-proof encasements on both the mattress and box spring. Choose sturdy, full-zip covers designed to last a year; they trap any survivors and block new hiding spots.
Pull the bed at least 6 inches from walls, and clear everything from beneath. Tuck bedding so nothing touches the floor. Create a barrier from nearby furniture. Place interceptor traps under each bed leg and inspect them daily. Keep displaced items in the same room.
Provide Full Access Points
Although pros bring the tools and chemicals, they can’t treat what they can’t reach, so your job is to open every access point.
Pull all furniture at least two feet from walls and baseboards. Lift mattresses and box springs out of frames, and clear everything stored under beds and sofas. Reposition large pieces so technicians can reach all sides.
Empty bookcases and desks, and leave them empty for treatment. Remove picture frames, clocks, shelves, and wall decor; place them on the floor in the same room for inspection.
Vacuum mattresses, box springs, carpets, and upholstered furniture thoroughly. Use a crevice tool on bedframes, baseboards, and corners. Seal and discard vacuum bags outdoors immediately.
- Make storage areas fully accessible
- Temporarily relocate dresser and closet contents
- Evacuate people and pets during and 4 hours after treatment
Preventing Reinfestation After Treatment
Once treatment wraps up, your goal is to stop survivors from spreading and keep new bugs from hitching a ride back in.
Follow your exterminator’s instructions: keep the home closed for the recommended hours, then air rooms for one hour. Don’t vacuum treated areas until 24–48 hours have passed, per their guidance. Wash and dry linens and clothing from treated rooms on hot settings for at least 30 minutes. Keep mattress and box spring encasements sealed for 12–18 months.
Reduce harborage: declutter sleeping areas, avoid storing items under beds or against walls, and vacuum floors, mattresses, and furniture regularly. Seal and discard vacuum bags outdoors immediately. Wash bedding weekly on high heat.
Travel smart: inspect hotel beds and headboards, keep luggage off floors, and launder travel clothes hot upon return. Don’t bring back items you removed pre-treatment without your pro’s okay; bag and hold items up to a year if needed.
Install interceptors, monitor for a year, document findings, and call your pro promptly if signs reappear.
Cost, Time, and Success Rates Compared
You’ll weigh upfront costs against follow-up visits and monitoring, since some methods are cheaper per room but need repeat treatments.
You’ll also compare how long each option takes—from same-day heat to multi-visit chemical or steam schedules.
Finally, you’ll match those timelines and budgets to real-world success rates so you pick the fastest reliable path to eradication.
Upfront Costs vs. Ongoing
Before you choose a bed bug strategy, weigh the trade-offs between high upfront costs and ongoing expenses, along with the time and success rates each method offers.
Heat and fumigation hit hard at the start—heat can run $400–$5,500 and fumigation $2,000+—but they deliver faster, higher eradication rates, often reducing repeat visits.
Chemical or insecticide options look cheaper upfront ($150–$400 per room; $264–$775 average), yet they typically need multiple rounds and longer cure times, raising total cost.
Follow-ups add up: inspections run $100–$150 per visit, quarterly plans cost $1,800–$2,100, and monthly or semi-monthly programs can reach $5,000–$8,350.
Whole-home jobs average $1,500–$5,000; large, multi-room projects can exceed $10,000 with re-treatments.
- Pay more now to reduce re-treatment risk
- Pay less now, accept repeated visits
- Combine methods to balance cost and success rate
Treatment Duration Breakdown
Although every infestation behaves differently, treatment timelines follow clear patterns that affect cost and success.
Heat treatment is the fastest: professionals raise rooms to about 120°F, hold it for 1–3 hours, and finish in a single day; schedule a follow-up inspection in two weeks.
Chemicals take longer: expect 2–3 visits over 3–4 weeks because eggs hatch in 6–10 days; each session runs 4–8 hours, spaced 10–14 days apart.
Fumigation requires vacating for at least 24 hours.
Freezing can work at 3.2°F for 80 hours, faster at lower temperatures.
Steam helps when combined with other methods.
DIY paths often stretch 6–8+ weeks with lower success.
Plan 1–2 hours for inspection, plus prep that can add 1–3 days; many pros offer 3–6 month guarantees.
Real-World Success Rates
With timelines in mind, it’s time to weigh what actually works in the field—how often treatments succeed, what they cost, and how long they take.
Professional heat hits over 95% success in one visit when temps stay above 113°F for 90 minutes and techs monitor thoroughly. You’ll pay more upfront and need scarce providers (only ~1% offer heat), but you’re buying speed and egg kill.
Chemicals can top 90% under ideal conditions, yet real-world surveys show about 50% after three visits, especially where pyrethroid resistance is common. DIY sprays usually fail.
Cold works at -15°C for a week but adds time.
To boost odds, combine methods and plan follow-ups.
- Heat: highest one-day success, higher cost, limited availability
- Chemicals: lower cost, more visits, resistance risk
- Integrated approach: best sustained control
Choosing a Qualified Pest Control Professional
Even if you’re enthusiastic to act fast, choose a pest control professional who’s properly licensed, trained, and up to date on regulations.
Act fast, but hire a licensed, well-trained pro who follows current regulations.
Verify an EPA Pesticide Applicator License for chemical treatments and confirm compliance with FIFRA. Check state requirements: most states mandate operator licenses; California requires a Structural Pest Control License; New York demands DEC certification. In Florida, look for the Pest Control Operator License with the appropriate specialty.
Ask about training. Most states require courses on safe pesticide use, environmental impacts, and exams covering bed bug biology, treatment methods, and safety protocols.
Specialists may hold tiered certifications focused on bed bugs.
Evaluate credentials. Strong candidates hold ACE, CPCT, or NPMA PRO certifications; NESDCA applies if they use scent-detection canines. NPMA PRO certification also requires at least one year of experience.
Confirm ongoing education. NPMA PRO techs need 30 hours every three years, including technical, safety, and regulatory updates.
Request proof of licenses, insurance, and recent continuing education.
Frequently Asked Questions
Are DIY Bed Bug Monitors Worth Using Between Professional Visits?
Yes—use them. You’ll catch problems early, especially low-level infestations, and you’ll often find more bugs than visual checks alone.
DIY interceptors and passive monitors detect most infested rooms over weeks, work with just one per room, and cost less and take less time than full inspections.
Choose reputable interceptors or passive monitors; avoid sticky traps with CO2 or heat. Maintain actives when required.
Regular placement between visits boosts detection and guides timely treatment.
Can Bed Bugs Spread Through Shared Laundry Facilities?
Yes, but it’s unlikely if you use heat and avoid cross-contact.
You reduce risk by bagging laundry, loading directly into machines, and drying on the hottest setting. Don’t use shared carts or folding tables; carry clean items home to fold on a white towel.
Inspect seams for flat, reddish-brown bugs or brown stains. Hot wash (125°F for 10 minutes) plus high-heat drying kills bugs and eggs.
Report sightings and avoid leaving bags overnight.
What Travel Habits Reduce Bringing Bed Bugs Home?
You reduce bringing bed bugs home by inspecting hotel beds, headboards, and nightstands before unpacking.
Keep luggage in the bathtub or on a luggage rack, not on beds or floors. Bag suitcases and dirty clothes in sealed plastic bags. Avoid placing items on upholstered surfaces.
After travel, vacuum luggage, check seams, and wash/dry all clothes on high heat.
Ask the front desk about prior bed bug issues and switch rooms if you see signs.
Are Bed Bug Bites Dangerous or Disease-Transmitting?
They’re not disease-transmitting, and bites usually aren’t medically dangerous. You can react in many ways: no marks, itchy welts, or, rarely, severe allergy or anaphylaxis.
Scratching raises risks of secondary infections like impetigo or lymphangitis, so keep nails short and use antiseptic if you break skin. Expect delayed reactions after re-exposure.
Bed bugs can still harm you indirectly—anxiety, insomnia, stigma, and costs add up—so prioritize prevention and prompt, effective eradication.
Do Mattress Encasements Help After Treatment Is Completed?
Yes—mattress encasements help a lot after treatment. You lock in any survivors so they can’t feed, reproduce, or hide in seams, and they eventually die.
You also force remaining bugs to the surface, making them easier to spot. With bite-proof fabric, tight zippers, and sealed seams, you block new bed bugs from re-infesting.
Cover both mattress and box spring, keep them on long-term, and pair with inspections and vacuuming for best results.
Conclusion
You’ve got options to beat bed bugs—and keep them gone. Spot the signs early, prep thoroughly, and choose treatments that fit your situation: heat for fast, whole-room kills; chemicals and new insecticides for targeted follow-up; and IPM to prevent rebounds. Work with a qualified pro, compare costs, timelines, and success rates, and don’t skip post-treatment monitoring. With smart preparation, coordinated methods, and vigilance, you’ll reclaim your home and stop reinfestations before they start. You’ve got this.